方法一、docker pull httpd
查找Docker Hub上的httpd镜像
runoob@runoob:~/apache$ docker search httpd
NAME                           DESCRIPTION                  STARS  OFFICIAL AUTOMATED
httpd                          The Apache HTTP Server ..    524     [OK]
centos/httpd                                                7                [OK]
rgielen/httpd-image-php5       Docker image for Apache...   1                [OK]
microwebapps/httpd-frontend    Httpd frontend allowing...   1                [OK]
lolhens/httpd                  Apache httpd 2 Server        1                [OK]
publici/httpd                  httpd:latest                 0                [OK]
publicisworldwide/httpd        The Apache httpd webser...   0                [OK]
rgielen/httpd-image-simple     Docker image for simple...   0                [OK]
solsson/httpd                  Derivatives of the offi...   0                [OK]
rgielen/httpd-image-drush      Apache HTTPD + Drupal S...   0                [OK]
learninglayers/httpd                                        0                [OK]
sohrabkhan/httpd               Docker httpd + php5.6 (...   0                [OK]
aintohvri/docker-httpd         Apache HTTPD Docker ext...   0                [OK]
alizarion/httpd                httpd on centos with mo...   0                [OK]
...
这里我们拉取官方的镜像
runoob@runoob:~/apache$ docker pull httpd
等待下载完成后,我们就可以在本地镜像列表里查到REPOSITORY为httpd的镜像。
runoob@runoob:~/apache$ docker images httpd
REPOSITORY     TAG        IMAGE ID        CREATED           SIZE
httpd          latest     da1536b4ef14    23 seconds ago    195.1 MB
方法二、通过 Dockerfile构建
创建Dockerfile
首先,创建目录apache,用于存放后面的相关东西。
runoob@runoob:~$ mkdir -p ~/apache/www ~/apache/logs ~/apache/conf
www目录将映射为apache容器配置的应用程序目录
logs目录将映射为apache容器的日志目录
conf目录里的配置文件将映射为apache容器的配置文件
进入创建的apache目录,创建Dockerfile
FROM debian:jessie

# add our user and group first to make sure their IDs get assigned consistently, regardless of whatever dependencies get added
#RUN groupadd -r www-data && useradd -r --create-home -g www-data www-data

ENV HTTPD_PREFIX /usr/local/apache2
ENV PATH $PATH:$HTTPD_PREFIX/bin
RUN mkdir -p "$HTTPD_PREFIX" \
    && chown www-data:www-data "$HTTPD_PREFIX"
WORKDIR $HTTPD_PREFIX

# install httpd runtime dependencies
# https://httpd.apache.org/docs/2.4/install.html#requirements
RUN apt-get update \
    && apt-get install -y --no-install-recommends \
        libapr1 \
        libaprutil1 \
        libaprutil1-ldap \
        libapr1-dev \
        libaprutil1-dev \
        libpcre++0 \
        libssl1.0.0 \
    && rm -r /var/lib/apt/lists/*

ENV HTTPD_VERSION 2.4.20
ENV HTTPD_BZ2_URL https://www.apache.org/dist/httpd/httpd-$HTTPD_VERSION.tar.bz2

RUN buildDeps=' \
        ca-certificates \
        curl \
        bzip2 \
        gcc \
        libpcre++-dev \
        libssl-dev \
        make \
    ' \
    set -x \
    && apt-get update \
    && apt-get install -y --no-install-recommends $buildDeps \
    && rm -r /var/lib/apt/lists/* \
    \
    && curl -fSL "$HTTPD_BZ2_URL" -o httpd.tar.bz2 \
    && curl -fSL "$HTTPD_BZ2_URL.asc" -o httpd.tar.bz2.asc \
# see https://httpd.apache.org/download.cgi#verify
    && export GNUPGHOME="$(mktemp -d)" \
    && gpg --keyserver ha.pool.sks-keyservers.net --recv-keys A93D62ECC3C8EA12DB220EC934EA76E6791485A8 \
    && gpg --batch --verify httpd.tar.bz2.asc httpd.tar.bz2 \
    && rm -r "$GNUPGHOME" httpd.tar.bz2.asc \
    \
    && mkdir -p src \
    && tar -xvf httpd.tar.bz2 -C src --strip-components=1 \
    && rm httpd.tar.bz2 \
    && cd src \
    \
    && ./configure \
        --prefix="$HTTPD_PREFIX" \
        --enable-mods-shared=reallyall \
    && make -j"$(nproc)" \
    && make install \
    \
    && cd .. \
    && rm -r src \
    \
    && sed -ri \
        -e 's!^(\s*CustomLog)\s+\S+!\1 /proc/self/fd/1!g' \
        -e 's!^(\s*ErrorLog)\s+\S+!\1 /proc/self/fd/2!g' \
        "$HTTPD_PREFIX/conf/httpd.conf" \
    \
    && apt-get purge -y --auto-remove $buildDeps

COPY httpd-foreground /usr/local/bin/

EXPOSE 80
CMD ["httpd-foreground"]
Dockerfile文件中 COPY httpd-foreground /usr/local/bin/ 是将当前目录下的httpd-foreground拷贝到镜像里,作为httpd服务的启动脚本,所以我们要在本地创建一个脚本文件httpd-foreground
#!/bin/bash
set -e

# Apache gets grumpy about PID files pre-existing
rm -f /usr/local/apache2/logs/httpd.pid

exec httpd -DFOREGROUND
赋予httpd-foreground文件可执行权限
runoob@runoob:~/apache$ chmod +x httpd-foreground
通过Dockerfile创建一个镜像,替换成你自己的名字
runoob@runoob:~/apache$ docker build -t httpd .
创建完成后,我们可以在本地的镜像列表里查找到刚刚创建的镜像
runoob@runoob:~/apache$ docker images httpd
REPOSITORY     TAG        IMAGE ID        CREATED           SIZE
httpd          latest     da1536b4ef14    23 seconds ago    195.1 MB
使用apache镜像
运行容器
docker run -p 80:80 -v $PWD/www/:/usr/local/apache2/htdocs/ -v $PWD/conf/httpd.conf:/usr/local/apache2/conf/httpd.conf -v $PWD/logs/:/usr/local/apache2/logs/ -d httpd
命令说明:
-p 80:80 :将容器的80端口映射到主机的80端口
-v $PWD/www/:/usr/local/apache2/htdocs/ :将主机中当前目录下的www目录挂载到容器的/usr/local/apache2/htdocs/
-v $PWD/conf/httpd.conf:/usr/local/apache2/conf/httpd.conf :将主机中当前目录下的conf/httpd.conf文件挂载到容器的/usr/local/apache2/conf/httpd.conf
-v $PWD/logs/:/usr/local/apache2/logs/ :将主机中当前目录下的logs目录挂载到容器的/usr/local/apache2/logs/
查看容器启动情况
runoob@runoob:~/apache$ docker ps
CONTAINER ID  IMAGE   COMMAND             ... PORTS               NAMES
79a97f2aac37  httpd   "httpd-foreground"  ... 0.0.0.0:80->80/tcp  sharp_swanson
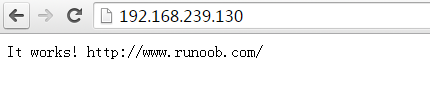
通过浏览器访问