
方法一、docker pull python:3.5
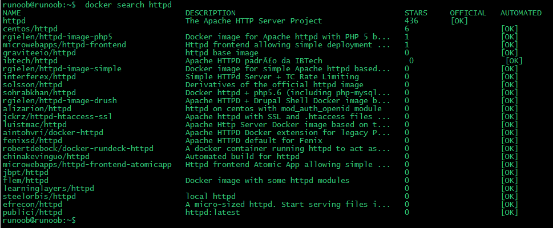
查找Docker Hub上的python镜像
runoob@runoob:~/python$ docker search python
NAME                           DESCRIPTION                        STARS     OFFICIAL   AUTOMATED
python                         Python is an interpreted,...       982       [OK]
kaggle/python                  Docker image for Python...         33                   [OK]
azukiapp/python                Docker image to run Python ...     3                    [OK]
vimagick/python                mini python                                  2          [OK]
tsuru/python                   Image for the Python ...           2                    [OK]
pandada8/alpine-python         An alpine based python image                 1          [OK]
1science/python                Python Docker images based on ...  1                    [OK]
lucidfrontier45/python-uwsgi   Python with uWSGI                  1                    [OK]
orbweb/python                  Python image                       1                    [OK]
pathwar/python                 Python template for Pathwar levels 1                    [OK]
rounds/10m-python              Python, setuptools and pip.        0                    [OK]
ruimashita/python              ubuntu 14.04 python                0                    [OK]
tnanba/python                  Python on CentOS-7 image.          0                    [OK]
这里我们拉取官方的镜像,标签为3.5
runoob@runoob:~/python$ docker pull python:3.5
等待下载完成后,我们就可以在本地镜像列表里查到REPOSITORY为python,标签为3.5的镜像。
runoob@runoob:~/python$ docker images python:3.5
REPOSITORY          TAG                 IMAGE ID            CREATED             SIZE
python              3.5              045767ddf24a        9 days ago          684.1 MB
方法二、通过 Dockerfile 构建
创建Dockerfile
首先,创建目录python,用于存放后面的相关东西。
runoob@runoob:~$ mkdir -p ~/python ~/python/myapp
myapp目录将映射为python容器配置的应用目录
进入创建的python目录,创建Dockerfile
FROM buildpack-deps:jessie

# remove several traces of debian python
RUN apt-get purge -y python.*

# http://bugs.python.org/issue19846
# > At the moment, setting "LANG=C" on a Linux system *fundamentally breaks Python 3*, and that's not OK.
ENV LANG C.UTF-8

# gpg: key F73C700D: public key "Larry Hastings <larry@hastings.org>" imported
ENV GPG_KEY 97FC712E4C024BBEA48A61ED3A5CA953F73C700D

ENV PYTHON_VERSION 3.5.1

# if this is called "PIP_VERSION", pip explodes with "ValueError: invalid truth value '<VERSION>'"
ENV PYTHON_PIP_VERSION 8.1.2

RUN set -ex \
        && curl -fSL "https://www.python.org/ftp/python/${PYTHON_VERSION%%[a-z]*}/Python-$PYTHON_VERSION.tar.xz" -o python.tar.xz \
        && curl -fSL "https://www.python.org/ftp/python/${PYTHON_VERSION%%[a-z]*}/Python-$PYTHON_VERSION.tar.xz.asc" -o python.tar.xz.asc \
        && export GNUPGHOME="$(mktemp -d)" \
        && gpg --keyserver ha.pool.sks-keyservers.net --recv-keys "$GPG_KEY" \
        && gpg --batch --verify python.tar.xz.asc python.tar.xz \
        && rm -r "$GNUPGHOME" python.tar.xz.asc \
        && mkdir -p /usr/src/python \
        && tar -xJC /usr/src/python --strip-components=1 -f python.tar.xz \
        && rm python.tar.xz \
        \
        && cd /usr/src/python \
        && ./configure --enable-shared --enable-unicode=ucs4 \
        && make -j$(nproc) \
        && make install \
        && ldconfig \
        && pip3 install --no-cache-dir --upgrade --ignore-installed pip==$PYTHON_PIP_VERSION \
        && find /usr/local -depth \
                \( \
                    \( -type d -a -name test -o -name tests \) \
                    -o \
                    \( -type f -a -name '*.pyc' -o -name '*.pyo' \) \
                \) -exec rm -rf '{}' + \
        && rm -rf /usr/src/python ~/.cache

# make some useful symlinks that are expected to exist
RUN cd /usr/local/bin \
        && ln -s easy_install-3.5 easy_install \
        && ln -s idle3 idle \
        && ln -s pydoc3 pydoc \
        && ln -s python3 python \
        && ln -s python3-config python-config

CMD ["python3"]
通过Dockerfile创建一个镜像,替换成你自己的名字
runoob@runoob:~/python$ docker build -t python:3.5 .
创建完成后,我们可以在本地的镜像列表里查找到刚刚创建的镜像
runoob@runoob:~/python$ docker images python:3.5
REPOSITORY          TAG                 IMAGE ID            CREATED             SIZE
python              3.5              045767ddf24a        9 days ago          684.1 MB
使用python镜像
在~/python/myapp目录下创建一个 helloworld.py 文件,代码如下:
#!/usr/bin/python

print("Hello, World!");
运行容器
runoob@runoob:~/python$ docker run -v $PWD/myapp:/usr/src/myapp -w /usr/src/myapp python:3.5 python helloworld.py
命令说明:
-v $PWD/myapp:/usr/src/myapp :将主机中当前目录下的myapp挂载到容器的/usr/src/myapp
-w /usr/src/myapp :指定容器的/usr/src/myapp目录为工作目录
python helloworld.py :使用容器的python命令来执行工作目录中的helloworld.py文件
输出结果:
Hello, World!


最新官方MySQL(5.7.19)的docker镜像在创建时映射的配置文件目录有所不同,在此记录并分享给大家:
官方原文:
The MySQL startup configuration is specified in the file
/etc/mysql/my.cnf, and that file in turn includes any files found in the/etc/mysql/conf.ddirectory that end with.cnf. Settings in files in this directory will augment and/or override settings in/etc/mysql/my.cnf. If you want to use a customized MySQL configuration, you can create your alternative configuration file in a directory on the host machine and then mount that directory location as/etc/mysql/conf.dinside themysqlcontainer.大概意思是说:
MySQL(5.7.19)的默认配置文件是 /etc/mysql/my.cnf 文件。如果想要自定义配置,建议向 /etc/mysql/conf.d 目录中创建 .cnf 文件。新建的文件可以任意起名,只要保证后缀名是 cnf 即可。新建的文件中的配置项可以覆盖 /etc/mysql/my.cnf 中的配置项。
具体操作:
首先需要创建将要映射到容器中的目录以及.cnf文件,然后再创建容器
命令说明:
查看容器运行情况
Brian
153***2799@qq.com
1年前 (2017-09-08)
liaozesong
lia***song@yeah.net
参考地址
docker 安装 mysql 8 版本